


I hope you all enjoyed last week's Twister Board Raincoat! If you missed it, be sure to check it out here. Seriously. Go do it.
Continuing with the REPURPOSE OCTOBER series, I have an awesome project for you all today.
A Studded Leather Foldover Clutch!
And it's lined. That's class right there, folks.
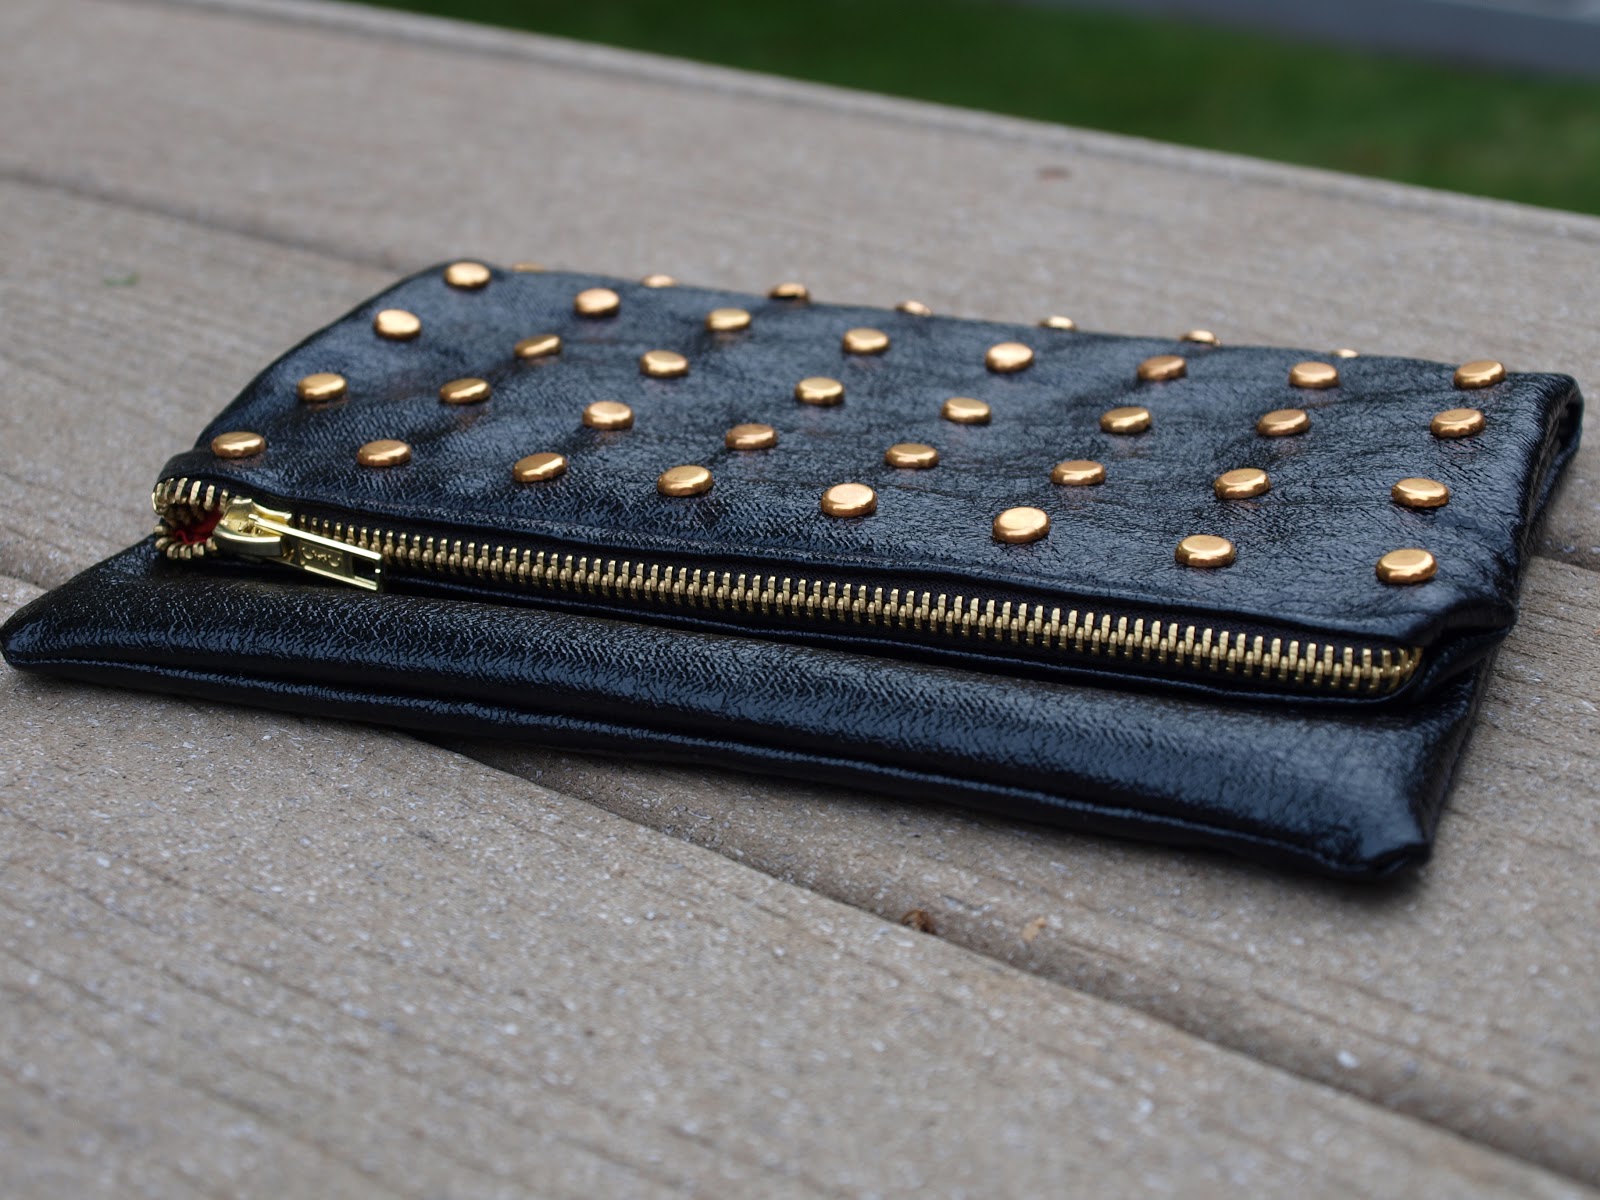

How is this a repurposed item? Those "studs" in the clutch are office supply store brads! Easily accessible and cost effective!

Don't forget to keep sending in your repurposed project ideas to elementalcarbon12(at)gmail(dot)com! I will be making a feature post at the end of October with my favorites!

Yes, it has a zipper, but I promise it's not scary! (I didn't even use a zipper foot...gasp!)
This tutorial can also be used to make a non-studded, non-pleather foldover clutch! (But what's the fun in that, right?)
Ready to learn how you can make your own? Read on!
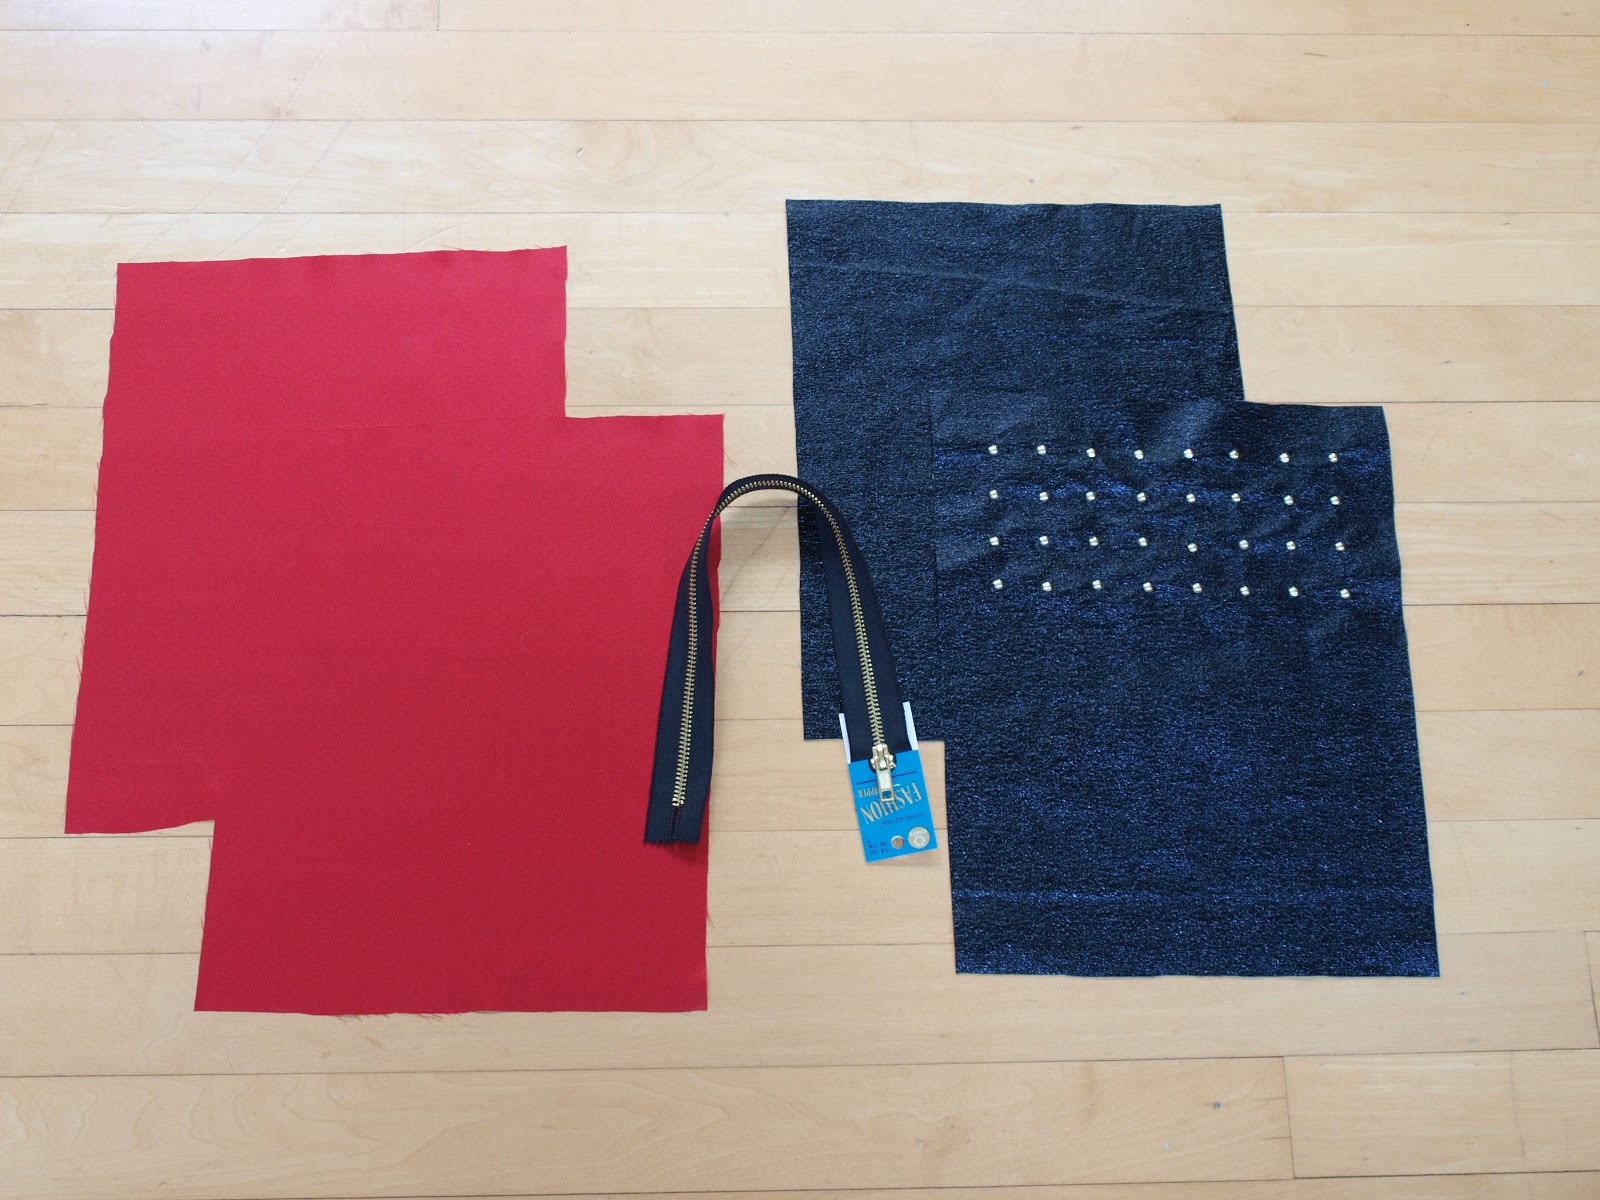
Here's what you'll need:
-Brads (from an office supply store or even scrapbooking brads work, too)
-Zipper (be sure to get a zipper that is longer than the width of the clutch that you want)
-Lining fabric
-Pleather fabric for the outside
-sewing machine, scissors, piece of graph paper, pen
Here's what you do:
1. Cut out your pieces of fabric. I made mine the size of a sheet of printer paper plus 1/4" seams. You will need two leather pieces and two lining pieces, all the same size.
Take a piece of graph paper the size you want the top of your clutch to be. Draw dots where you want the studs to go. Tape your stud pattern onto the top of a piece of your pleather.

Using a needle or other sharp object, poke holes through your leather fabric for the studs to go. Remove the paper, then put the studs through and bend out the sides.

This is what you should have when you are finished with this step:
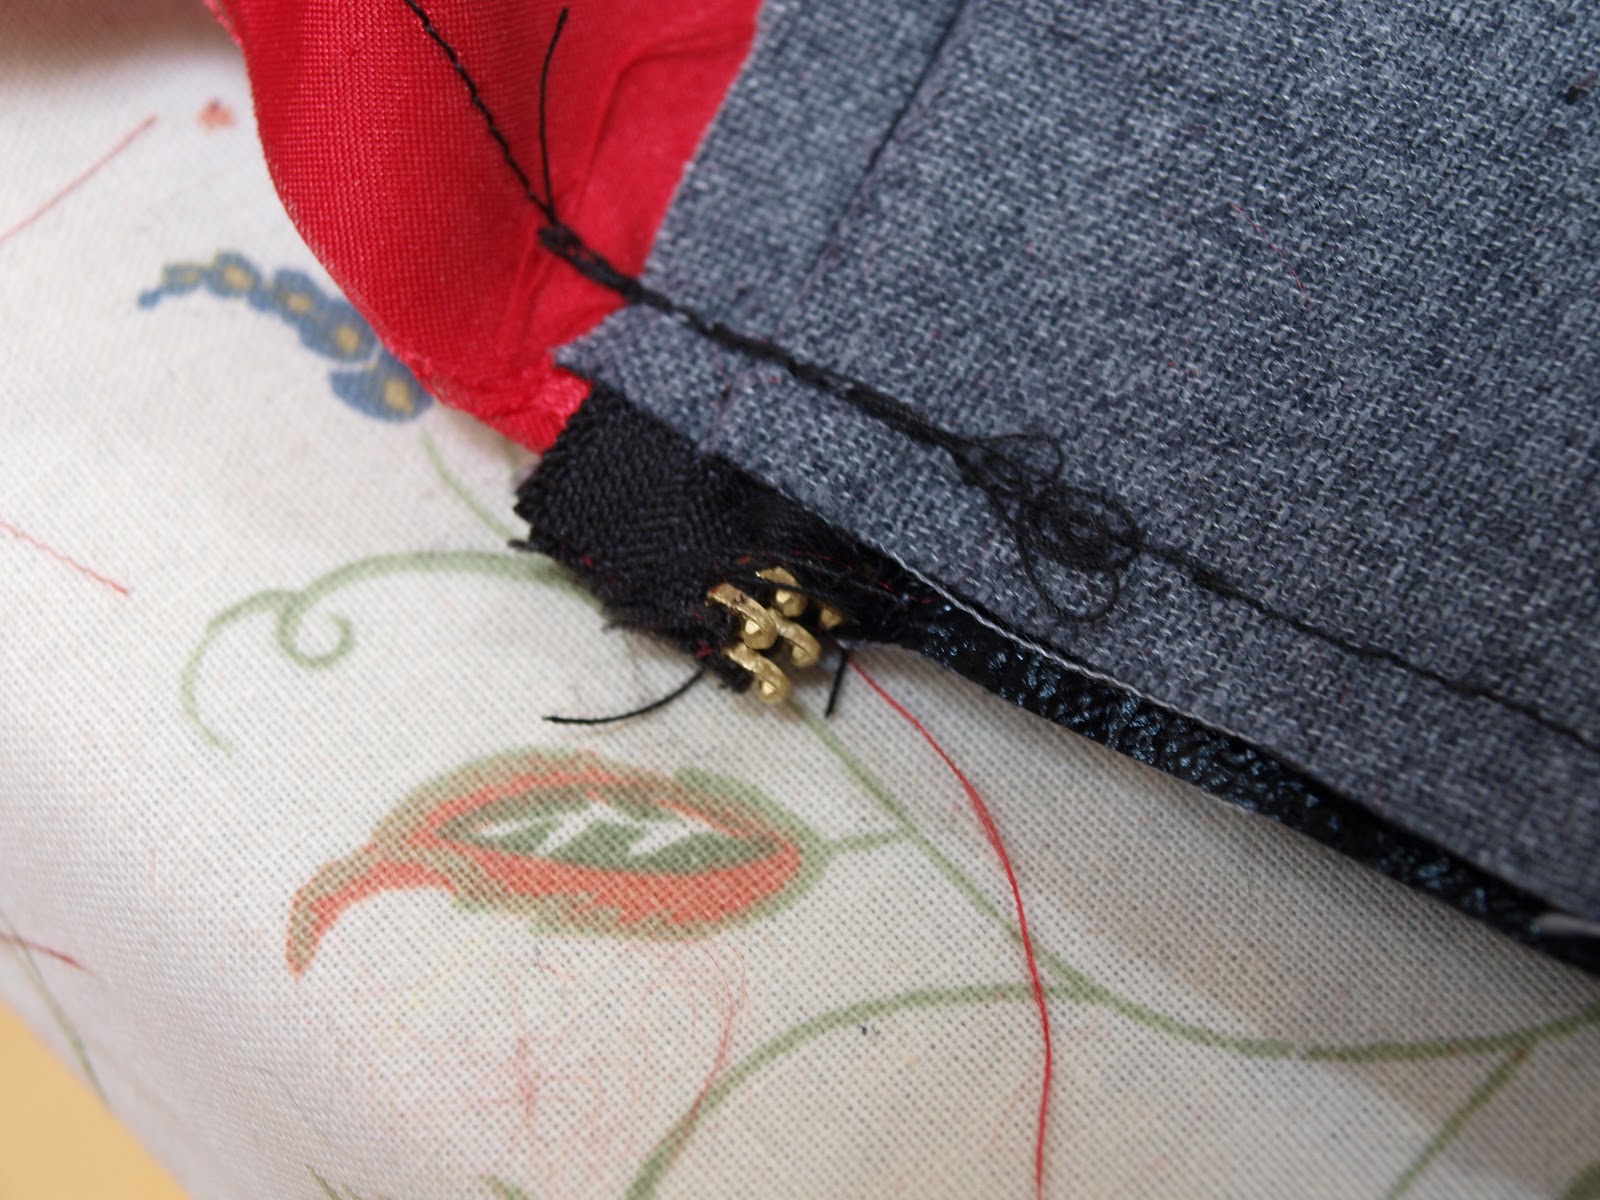
2. Pin the sides to the zipper like a sandwich - in this order: piece of lining right side up, zipper edge (zipper pull up), piece of leather right side down. The leather and the lining must be right sides into the zipper!
When dealing with the side that has studs, make sure the studs are on the side closest to the zipper so they will be at the top of the clutch.
Repeat this for the other side of the zipper.

3. Sew a straight line along both sides of the zipper.
(Here is where I become a bad influence and tell you that you don't need a zipper foot. As long as your zipper is a few inches longer than your clutch, you shouldn't have a problem sewing with a regular foot because you can leave the big clunky zipper pull far away from your sewing machine foot by unzipping it completely. This makes sewing a zipper easy peasy! Well, easier peasier...)
Now you can flip it right side out and it should look like this:

Topstitch along the zipper to give a nice finished look.
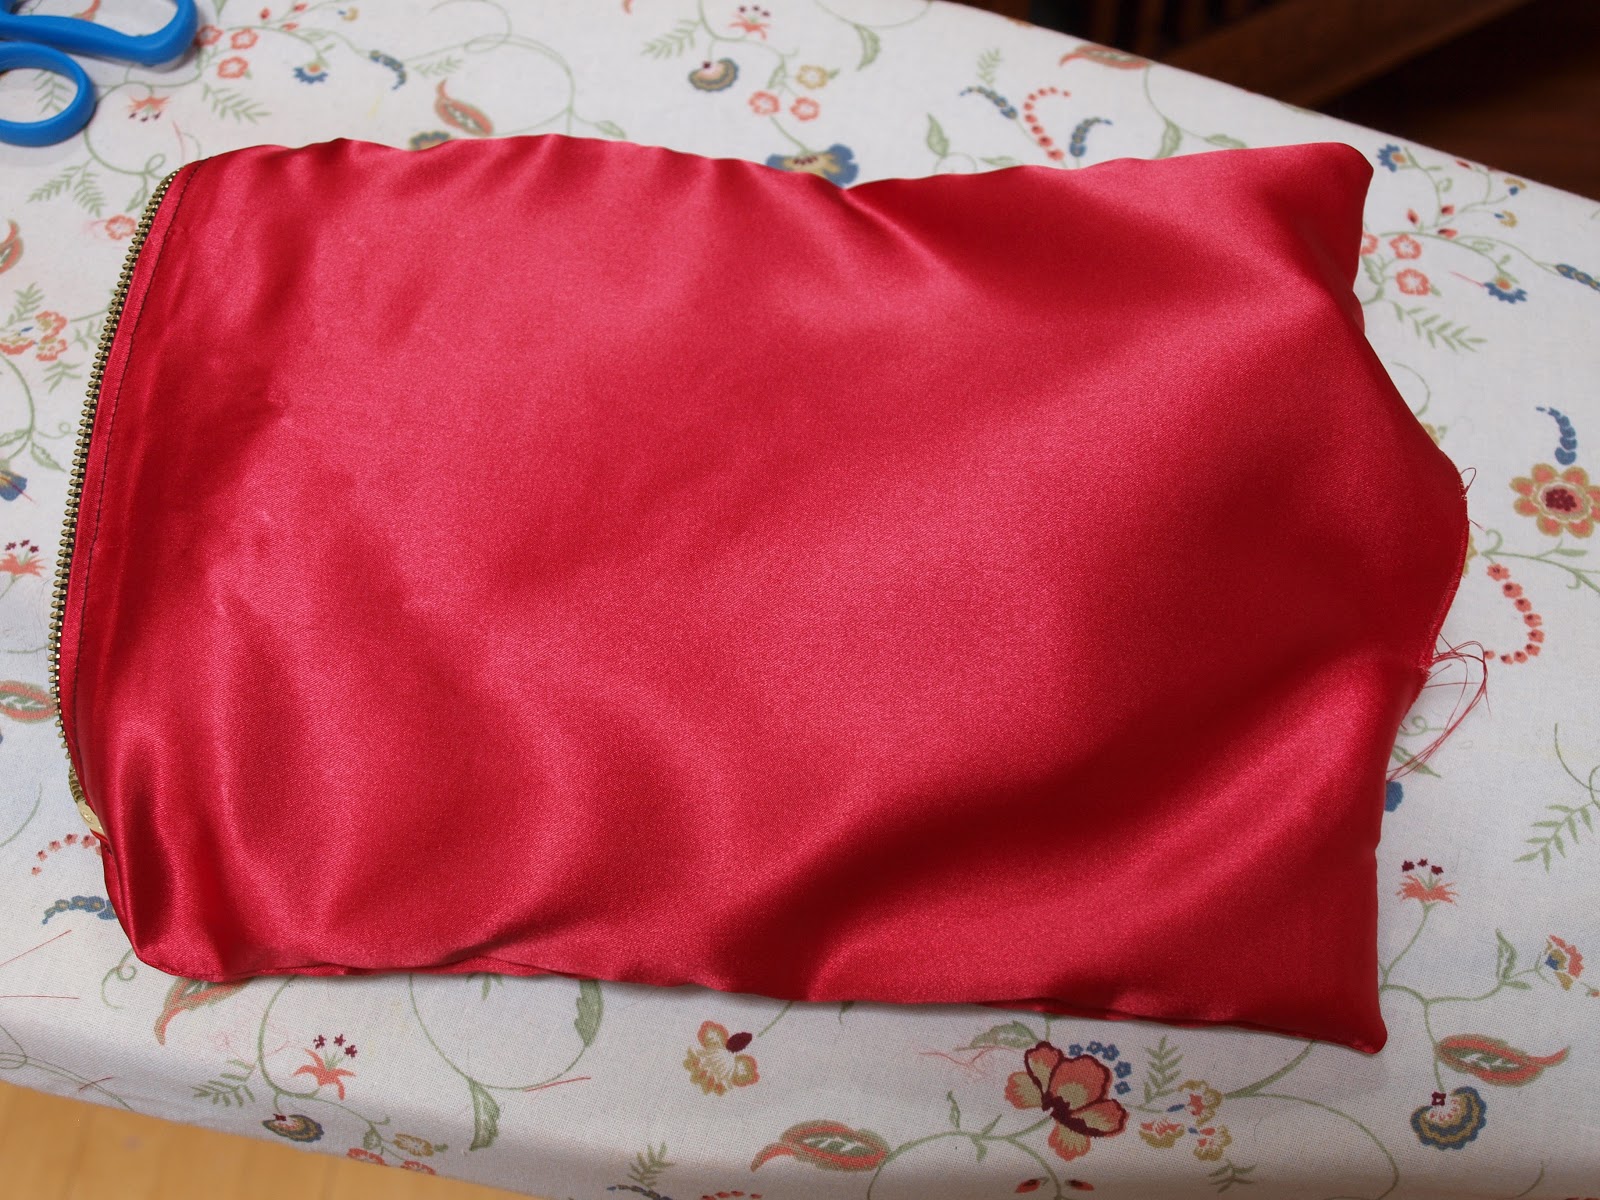
4. Now you will sew the leather sides and the lining sides together. First, zip your zipper to the middle of the clutch so you can turn it right side out later.
Put the leather right sides together and pin in place, then put the lining right sides together and pin in place. Sew a big ol' rectangle around the whole clutch, but leave about 5 inches open on the lining side!!

IMPORTANT: When you sew along the long sides and reach the zipper, stop sewing and use the wheel on the side of your machine to manually sew. If you get resistance, pick up the foot and move until you can sew again. If you don't do this, you will probably break your needle (ahem, not that I speak from experience or anything...)

5. Clip the corners to reduce bulkiness and trim the excess zipper off (but not with fabric scissors!)

6. Now, turn your clutch inside out through the gap you left in the lining fabric. It should look like this:
Now, sew that gap closed by folding the ends in, pinning, and making a straight stitch.

7. Finally, turn your entire clutch right side out through the gap that zipping the zipper halfway leaves.
You're done! Woohoo!
Now go rock that studded clutch.
Don't forget to be sending in your repurposed crafts!
_______________________________________________________________________
"If God is for us, who can ever be against us?"
-Romans 8:31
Have a great week!

wow, what a great project! love it! new follower :)
ReplyDeleteGreat tutorial.
ReplyDeleteThank you!
OMG! i love clutches!! they are my FAVE kind of purse AND adding the studs is so cute & edgy at the same time! i miss you friend!
ReplyDeleteGorgeous DIY! I love clutches!
ReplyDeletewww.onlyforfashionvictim.blogspot.it
The brad idea--genious! I pinned this.
ReplyDeleteWow ! What a fab tutorial ! This may sneak to the top of my 'must do' list !!!
ReplyDeleteS x
I came across this post veerrrry long after you published it, yet still....Very well explained! I also love your scriptural reference at the end :-) I so totally agree!
ReplyDeleteSo pretty!Thank you!!!
ReplyDelete